Wellness Minneapolis
  • Home
  • Appointments
  • Dr. Barrett
    • About Dr. Barrett
    • Mentoring
    • Dr. Barrett's Blog
  • Dr. Aidanne
  • Jesse Haas, CNS, LN
  • Resources
    • Blog
    • Recipe Box
    • Trusted Resources
    • Book List
  • Newsletter Signup
  • About
    • Naturopathic Medicine
    • Forms
    • Testimonials
    • FAQs >
      • Charm FAQ
  • Contact
  • Shop

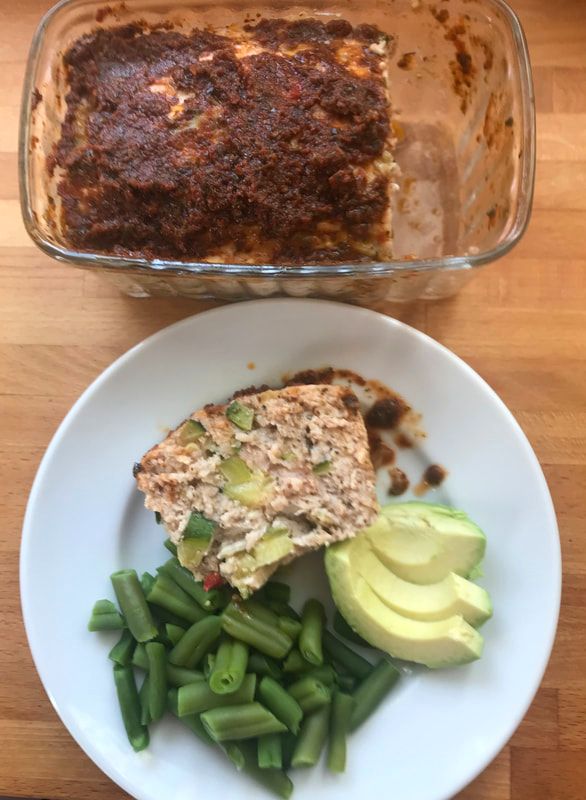
Glazed Turkey Meat Loaf

2/23/2022

0 Comments

 
From the kitchen of Lynn Salmon-Easter, Reiki Master
Picture
​I feel fortunate to be surrounded by great cooks in my family. One of my most favorite recipes I have received from my aunt who is a French chef is this down-home comfort food recipe.

This meat loaf is delicious straight out of the oven or excellent cold as leftovers as well. I often use up tidbits of leftover veggies from my fridge in this meat loaf, but the tried and true recipe can be found below.

This recipe is adapted from Marysue Salmon from Cooking Light
​

Makes 12 servings 

Ingredients
  • 2-4 teaspoons olive oil
  • 1 cup chopped onion
  • 3/4 cup chopped carrot
  • 1/2 cup chopped green onion
  • 2 minced garlic cloves
  • 1/2 cup chopped red pepper
  • 2 1/4 - 2 1/2 pounds of ground turkey (or ground chicken)
  • 1 cup dry breadcrumbs (optional)
  • 1 teaspoon each: nutmeg, cumin, coriander
  • 2 eggs, beaten
  • 1/3 cup catsup
  • 1 cup catsup or chili sauce
  • 3 tablespoons brown sugar

Directions
  1. Sauté vegetables, through garlic, in optional oil about 5 minutes or until soft.
  2. Combine with turkey, crumbs, 1/3 cup catsup, seasonings, and eggs, and mix well. 
  3. Mixture will be wet. 
  4. Shape into 9 x 5 inch loaf and place on a broiler pan. Bake at 350 degrees 45 minutes. Remove from oven, spread mixture of catsup-brown sugar on top, and return to 350 degree oven for 30-45 more minutes, or until glazed and done. 
  5. Let stand a few minutes before cutting. 

0 Comments

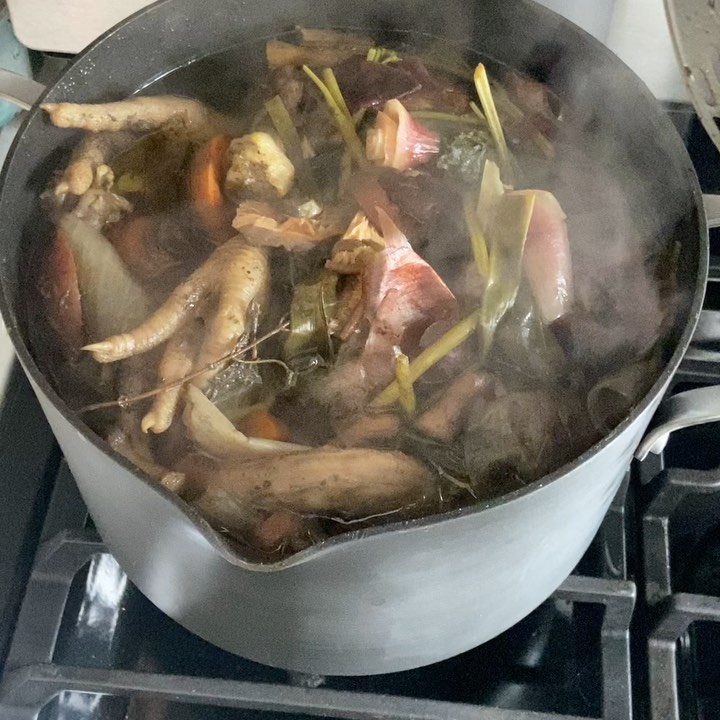
Bone Broth: An Infusion of Healing Ingredients

1/25/2022

5 Comments

 
From the kitchen of Jesse Haas, CNS, LN
Picture
I think about bone broth in a similar way to smoothies: it's a vessel that can pack a healing nutrient punch!

There are a couple factors that elevate bone broth from a soup base to a healing elixir:​
  1. Ingredients
  2. Time

Ingredients
While most bone broths contain similar base ingredients including onions, garlic, carrots, celery and joint bones, it can be infused with functional ingredients like chicken hearts, mushrooms, seaweeds, herbs and spices for additional nutritional benefit.

I like using chicken necks and feet as the bone base for my broths, because these parts contain many joints containing collagen and glutamine for healing. I also add chicken hearts for an infusion of CoQ10. Coenzyme Q10 - shortened CoQ10 - is a compound that plays an important role in energy metabolism in the body. It is also a potent antioxidant and contributes significantly to fertility and cardiovascular health.

Mushrooms are one of few foods containing vitamin D. They also contain polysaccharaides (aka fibers) that nourish the microbiota and other powerful compounds that promote hormone balance, support immunity and mental wellness. I most often throw a couple dried shiitake mushrooms into my bone broth, but there's benefits even in white button mushrooms. Use what's accessible!  

Seaweeds contain many minerals, including iodine, which is scarce in the Midwest, as well as essential fatty acids. Adding a couple inches of kombu, dulse or other seaweed to your bone broth is like adding a multi-mineral. 

The herbs and spices I use in my bone broth somewhat depends on my plan for it. For example, I'll make a broth with lemongrass, ginger, turmeric and cilantro for southeast Asian-inspired soups and dishes. For my Mediterranean cooking I'll use bay laurel, black peppercorns, rosemary, thyme and dried basil. All of these flavorful ingredients have anti-inflammatory properties. 

Time
To draw the most nutritional benefit out of the ingredients you put in your stock pot, simmer on low heat for a long time. My preferred method is to fill my stockpot with my bone broth ingredients and simmer it overnight on my stovetop. You can also use a crockpot or pressure cooker to make bone broth. 

What you'll notice is that in addition to making a rich, delicious infusion for your cooking, your bone broth will have a jelly-like consistency when it cools. This is evidence of collagen and gelatin breaking down from the joint meats you put in your pot and infusing into your broth. The consistency will melt into a drinkable, cookable golden liquid that I hope you fawn over as much as I do. 

Use bone broth for cooking whole grains and beans, soups and stews, steaming or water sautéing vegetables, or drinking like tea. There are many variations for the recipe below, so feel free to experiment and find a method that works best for you. This is a largely unattended process and easy to incorporate into your weekly cooking tasks. 


Basic Bone Broth

Ingredients
  • ​1 chicken carcass or 1 bundled chicken back and necks* (about 1.5#)
  • 2 carrots, washed and coarsely chopped
  • 3 celery stalks, washed and coarsely chopped
  • 1 large yellow onion, cut into chunks (leave the skin on for a nice caramel color - if there isn’t too much dirt!)
  • 2 bay leaves
  • 2 tsp turmeric
  • 2 Tbsp apple cider vinegar
  • salt and pepper to taste
  • 2 Tbsp dried herbs or 1/2 cup fresh: parsley, thyme, oregano, marjoram…whatever you have on hand and want to add
  • 1 handful of dry Asian mushrooms like shiitake (optional)
  • several cloves of garlic, peeled and chopped
  • 1” strip Kombu sea vegetable (optional) 

Directions
  1. Throw all the ingredients in a large soup pot.
  2. Cover with water until everything is submerged by 1 inch.
  3. Cover the pot with its lid and place over medium-low heat. Avoid boil, but keep the broth on a low simmer for several hours or overnight.
  4. After cooking, take the bones and meat out and sieve the stock through a fine mesh strainer to get the smaller pieces out.
  5. Refrigerate what you will use in 5 days and freeze the rest in portion-sized containers (pints, quarts, or larger) once the broth has cooled. If you have broth thawed more than 5 days, boil for 3 minutes before using.

Picture
Jesse Haas, CNS, LN is a licensed functional nutritionist and certified health coach. She was a founding partner of Wellness Minneapolis and was an active practitioner with the clinic from 2014-2022. To connect with her regarding functional nutrition and health coaching services, please follow this link.
5 Comments

Mum's Curry Rice Salad

6/9/2021

0 Comments

 
From the kitchen of Lynn Salmon-Easter, Reiki Master
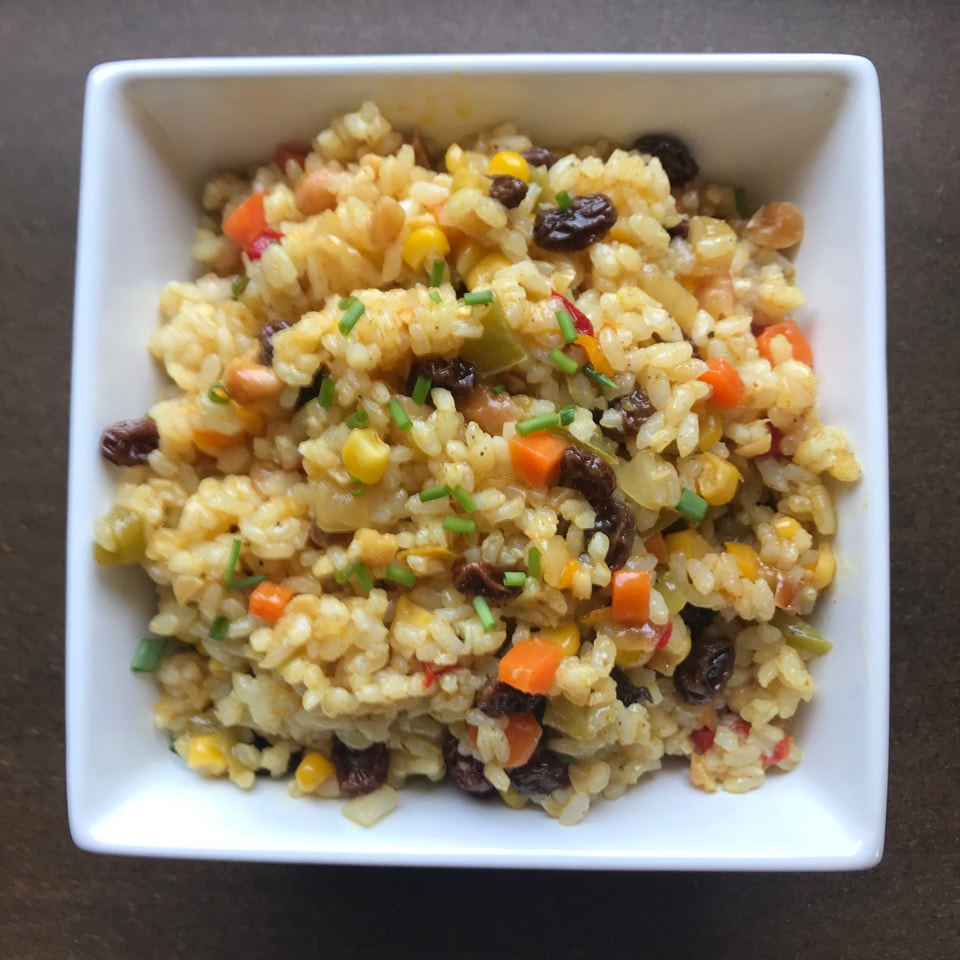
A rice mixture with carrots and currants in a square white dish
This is a recipe from my husband’s grandmother, Gwen, who was Australian. Most of her side dishes had curry in them!

This is a recipe to share. It makes a wonderful dish to take to gatherings, picnics or potlucks. Quick to make and there are never any leftovers.
 
Makes about 10 servings (1 cup each serving)

Dressing: Place all ingredients into a jar and shake.
  • 1/2 cup olive oil
  • Juice 1 large lemon
  • 2 Tbsp fruit chutney or apricot jam
  • 1 tsp salt (optional)
  • 1 tsp ground black pepper 
  • 1 tsp curry powder

"Chewy Bits"
  • 3-4 cups cooked rice
  • 1 cup raisins
  • 1 cup roasted almonds, cashews, walnuts or cashews (or a mixture)
  • 1/2 each of red & green pepper, diced
  • 1 large white onion, diced
  • 1/2 cup celery or carrot, diced
  • 1/2 cup corn kernels

Directions: 
  1. Cook the rice according to its package until it's just tender, drain.
  2. Add the other ingredients and mix the dressing in until everything is well-coated.
  3. Let the salad sit for a 1-2 hours or overnight to cool and to allow the flavors to mingle before eating or serving. 

0 Comments

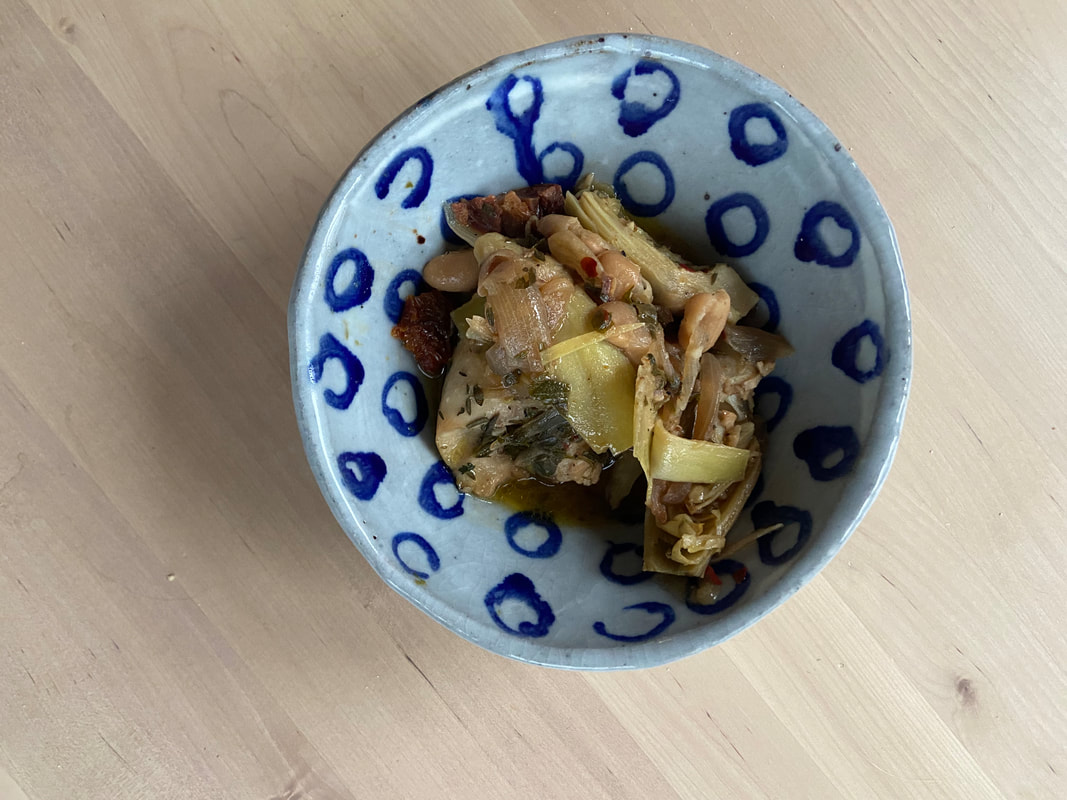
One Pot Lemon Artichoke Chicken

5/26/2021

0 Comments

 
From the Kitchen of Jesse Haas, CNS, LN
Picture
After more than 10 years of studying nutrition, I have come to the conclusion that fiber is a magical thing. 

We talk a lot about gut and microbiome health around here. As we understand more and more about the incredible ecosystems living in and on our bodies, nourishing and caring for them becomes higher and higher priority. It is clear that if the microbiome is healthy, we as individuals have a better chance of actually experiencing wellness: mind, body and heart. 

There are multiple forms of fiber. The most well-known are soluble and insoluble fibers. Soluble fiber absorbs water, whereas insoluble fiber does not. Both are important. Soluble fiber is a good binder for toxins and metabolites. The viscosity of it also smoothes transit of food through the digestive tract. Soluble fiber adds bulk to stool, giving the colon feedback that stimulates bowel movement. 

Lesser known fibers include prebiotics and resistant starches. These fibers have a super functional role in selectively feeding beneficial microorganisms like lactobacillus and bifidobacteria that maintain the environment of the colon and help prevent overgrowth of potentially pathogenic bacteria and yeast. 

In general, Americans need to eat more fiber. The USDA recommends adults eat 25-30 grams per day, though most Americans get about half that. Our hunter-and-gatherer ancestors ate closer to 100 grams per day. 

Here's a nutrition-packed one pot recipe including some fiber superstars: artichoke hearts and legumes. 

Ingredients
  • 10 sun-dried tomatoes, soaked in hot water for 10 minutes
  • 2 Tbsp extra virgin olive oil
  • 1 medium red onion, diced
  • 4 cloves garlic, crushed
  • 2 lemons, zested and juiced
  • 2 tsp thyme
  • 1 tsp rosemary
  • 1/2 tsp chili flakes
  • 1 15-oz can cannellini beans, drained and rinsed
  • 1 15-oz can artichoke hearts, drained
  • 6 boneless chicken thighs
  • 1 cup water

Directions
  1. Heat a large skilled over medium heat. Add oil, onions and garlic. Sauté for 3-5 minutes or until the onions are fragrant and translucent.
  2. Add lemon zest and juice, thyme, rosemary and chili flakes. 
  3. Spoon in the cannellini beans, artichoke hearts and (drained) sun-dried tomatoes to the skillet and stir well to combine. 
  4. Place the chicken thighs in a single layer over the skillet mixture. 
  5. Add water, cover and cook at a low simmer for 15-20 minute or until the inner temperature of the chicken thighs reach 165 degrees F. 

Jesse Haas, a white, cis-female with brown hair and dark glasses. She’s wearing a bright green sweater.
Jesse Haas, CNS, LN is a licensed functional nutritionist and certified health coach. She was a founding partner of Wellness Minneapolis and was an active practitioner with the clinic from 2014-2022. To connect with her regarding functional nutrition and health coaching services, please follow this link.
0 Comments

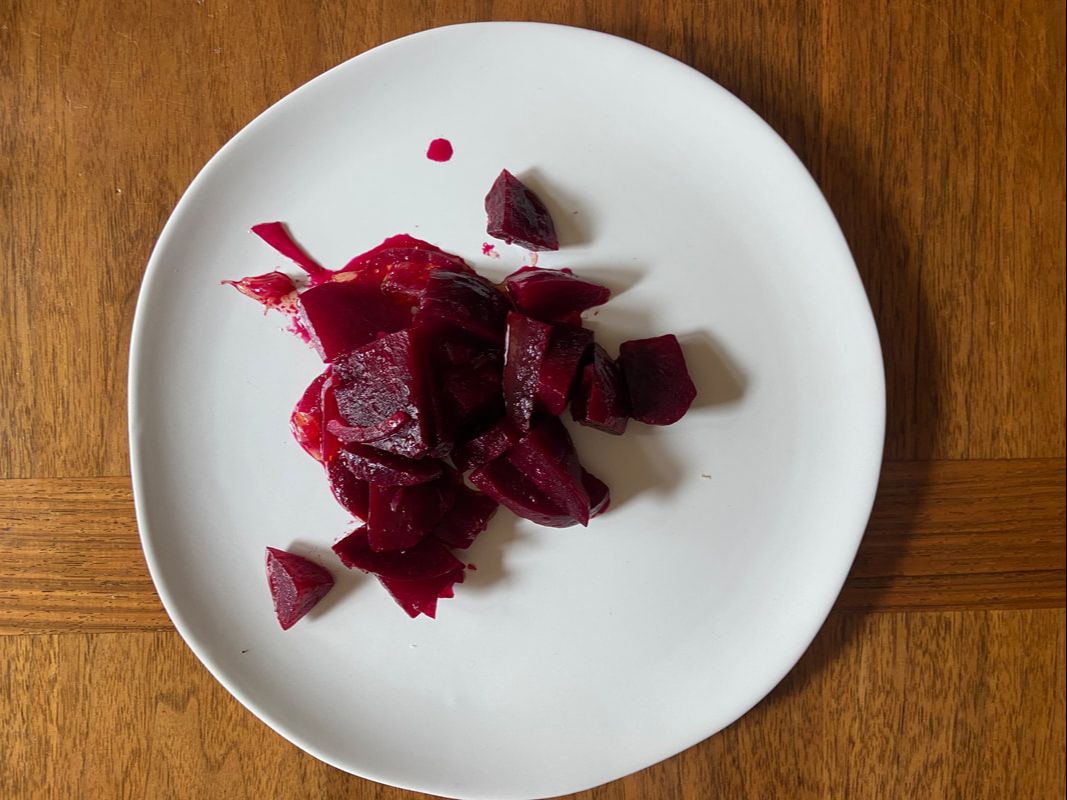
Citrus Beet Salad

4/20/2021

0 Comments

 
From the kitchen of Jesse Haas, CNS, LN
Picture
Beets are remarkable roots, not only because of their vibrant color but because of their functional nutrient value, as well. 

Beets contain a special kind of fiber called galactooligosaccharide (or GOS). GOS stimulates growth of bifidobacteria and lactobacilli in the colon. These microorganisms are important anchors in the microbiome for many reasons, one of which is that they maintain the mucosal membrane. This helps to maintain a healthy ecosystem in the gut and prevent proliferation of "bad bugs" that can cause digestive symptoms and other health problems. 

Not everyone is a big fan of the earthy taste of beets, so here's some good news: you don't have to eat beets to get GOS. GOS can be found in legumes, brassicas, sourdough bread, sunflower and pumpkin seeds. 

This Citrus Beet Salad is best enjoyed during the winter months when citrus fruits are in their peak. 

Makes 4-6 servings

Ingredients
  • 4 medium beets
  • 1-2 grapefruit, peeled and cut into segments
  • 1/2 small red onion, cut into thin slices
  • juice of 1/2 lemon
  • 2 Tbsp extra virgin olive oil
  • 1 tsp honey
  • salt and pepper, to taste

Directions
  1. Scrub the beets to clean off any dirt. Place in a large saucepan and cover with water. Bring to a boil, cover and cook until the beets are easily pierced with a fork (about 30-45 minutes depending on size).
  2. While you're waiting for the beets to cook, mix together the grapefruit segments, red onion, lemon juice and olive oil. The acid from the citrus will mellow the bite of the onion. Cover and refrigerate. 
  3. When the beets are cooked, remove them from heat. Refrigerate until cool enough to handle.
  4. Slip the skins off the beets with your hands or with a paring knife. 
  5. Cut in half and then into half moons. 
  6. Mix beets with the citrus, onion mixture and season with salt and pepper. 

This is a recipe that gets better marinating in the refrigerator for a day or two. Enjoy at room temperature or served over a handful of arugula or butter lettuce. 

Picture
Jesse Haas, CNS, LN is a licensed functional nutritionist and certified health coach. She was a founding partner of Wellness Minneapolis and was an active practitioner with the clinic from 2014-2022. To connect with her regarding functional nutrition and health coaching services, please follow this link.
0 Comments

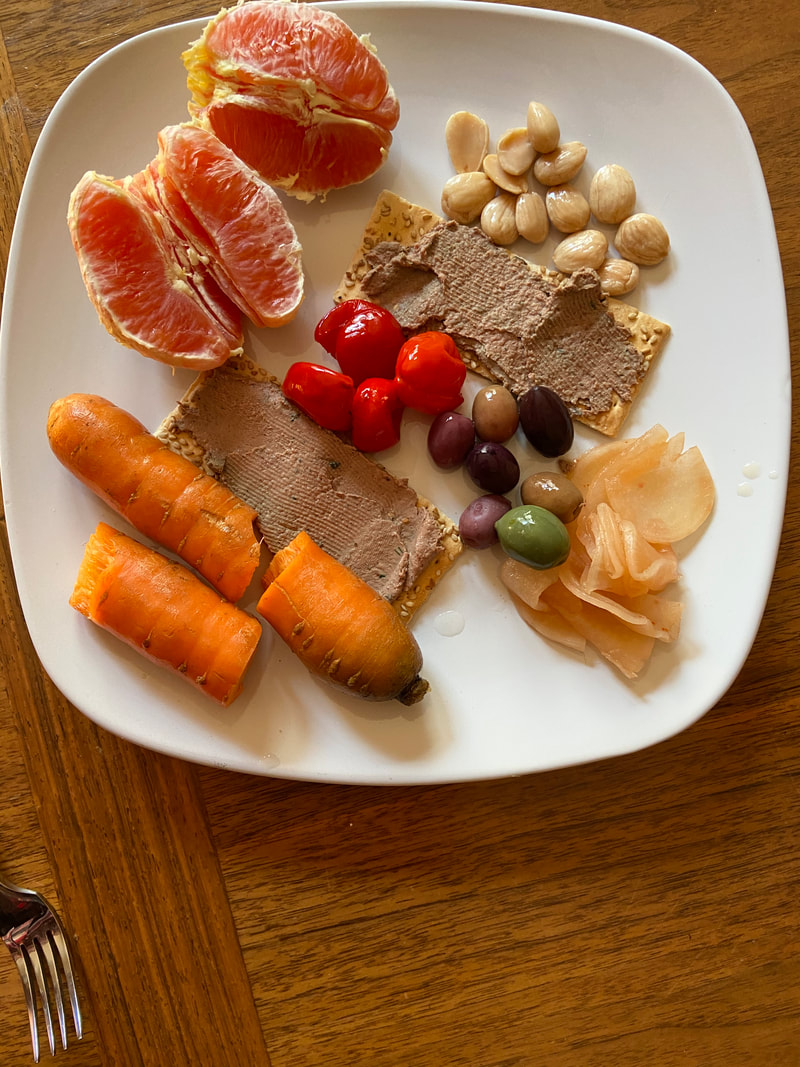
Chicken Liver Pâté (Dairy-Free)

3/10/2021

1 Comment

 
From the Kitchen of Jesse Haas, CNS, LN
Picture
Liver: you love it or you hate it.

Personally, I LOVE liver, especially as pâté. 

Pâté is on the menu for every holiday and special occasion I cook for. If it is offered at a restaurant, I order it. I love the silky mouth-feel that turns many people off from liver. There's something about it that just screams decadence...and I heartily answer the call. 

I think of liver as a superfood. When I'm feeling energetically rundown, it's the first food on my list to replenish myself with. Pâté is one of my go-to recipes for nourishing my loved ones after childbirth or surgery (if they'll eat it). Liver is an excellent source of iron, making it on the list for my clients with heavy menstrual flow or iron-deficiency anemia. It's also an awesome source of vitamins A and D, it's also a tonic for the immune system. 

When buying liver, you want to pay extra close attention to the sourcing. In all animals, the liver manages the toxic burden, transforming and packaging chemicals like fertilizers and pesticides, medications like antibiotics and everything else the animal breathes and swallows. Look for free-range, organic and/or pasture-raised options. Best yet: connect with a farmer who can tell you everything about what their animals eat, drink and breathe.

Most pâté recipes include cream and butter. This dairy-free version uses duck fat to keep the creaminess, while bringing sherry in for a splash of brightness. Serve with crudité and seeded crackers in the backyard this spring and imagine you're sipping wine on the sidewalk in France.

Makes many servings - freeze what you don't eat in 3 days in quarter pint jars for up to 6 months

Ingredients
  • 4 Tbsp duck fat or schmaltz (chicken fat), separated
  • 1 vidalia onion, diced
  • 4 cloves garlic, minced
  • 1 lb free range, organic chicken livers​
  • 2 Tbsp dry sherry
  • 1 tsp dried thyme
  • 1/2 tsp dried rosemary
  • salt and black pepper, to taste

Directions
  1. Heat a large skillet over medium heat. Add 1-2 Tbsp duck fat and melt. 
  2. Sauté onions and garlic until translucent and fragrant, about 5 minutes. Stir often to prevent browning. Remove to a food processor bowl. 
  3. Return the skillet to the heat. Add 1 Tbsp duck fat and melt. 
  4. Add livers to the skillet in a single layer, keep them from touching. Cook for 3 minutes, then flip over and cook 2-3 minutes longer. The outside of the livers will be browned, but the insides should remain pink. Remove to the food processor bowl. 
  5. Turn the heat off on your stove. Add sherry to the skillet and scrap to deglaze. Add contents to the food processor bowl, with the salt and dried herbs. 
  6. Blend in your food processor until smooth. Season to taste with salt and freshly ground black pepper.

Picture
Jesse Haas, CNS, LN is a licensed functional nutritionist and certified health coach. She was a founding partner of Wellness Minneapolis and was an active practitioner with the clinic from 2014-2022. To connect with her regarding functional nutrition and health coaching services, please follow this link.
1 Comment

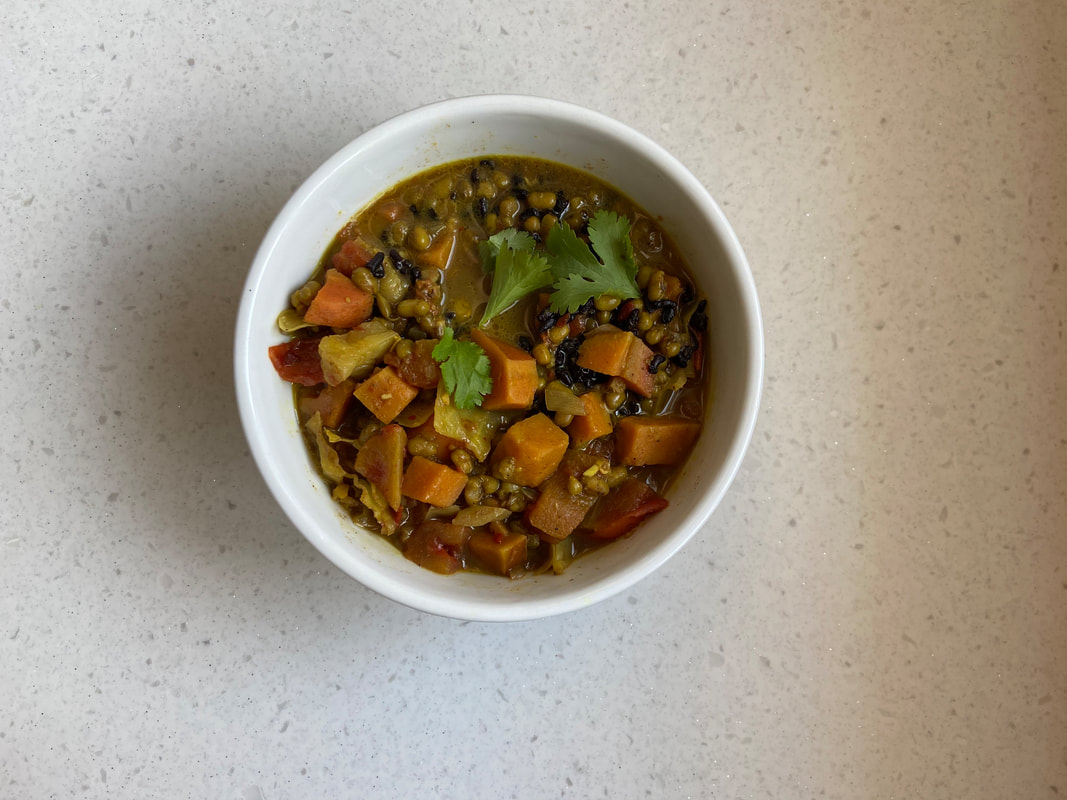
Indian-Spiced Mung Bean Soup

2/3/2021

0 Comments

 
From the Kitchen of Jesse Haas, CNS, LN
Picture
This hearty, one-pot recipe has been a long-time favorite of mine. I try to work in at least one recipe featuring beans into my weekly meal plan and mung beans are one of my favorites. They are tiny green beans common in Indian cuisine that cook up quickly to a velvety texture. You can find mung beans in the Twin Cities in the bulk department at your local grocery coop or at Indian groceries. 

Indian spices are great for reducing inflammation, so I encourage everyone to get a few Indian recipes in rotation with your go-to meals. This recipe incorporates Garam masala, a spice blend including cumin, coriander, cardamom, black pepper, cinnamon, cloves and nutmeg. All of these spices offer therapeutic benefits with their delicious flavor. I blend my own from whole spices that I roast and grind, but you can also find Garam masala and other delicious curry blends at the locations named above.

The heat of this recipe is very versatile, so if you have "Minnesota mouth" skip the chili flakes at the end. 

Makes 6 servings


Ingredients
  • 1 Tbsp ground turmeri
  • 1 Tbsp ground cumin
  • 2 Tbsp Garam masala
  • 2 Tbsp coconut oil
  • 1 medium onion, diced
  • 4 garlic cloves, pressed
  • 2-inch piece of ginger, minced
  • 1 cup dried green mung beans, rinsed
  • 1 medium sweet potato, diced
  • 2 cups cauliflower florets
  • 2 cups chopped cabbage
  • 5 cups chicken or vegetable stock
  • 15-oz can unsweetened coconut milk
  • 15-oz can crushed tomatoes
  • salt and black pepper, to taste
  • red pepper flakes, to taste
  • 3 cups cooked brown or black rice
  • cilantro leaves, to garnish

Directions
  1. Heat coconut oil in a large soup pot. Add spices and sauté briefly to release the aromas. Add onions, garlic and ginger and sauté a few minutes. 
  2. Add the mung beans and the rest of the veggies. Stir to disperse the spices and gently sauté these ingredients with the aromatics, about 1 minute. 
  3. Add the stock and coconut milk. Cover and bring to a simmer. Cook until the beans are tender, about 15 minutes. 
  4. Stir in the tomatoes and red pepper flakes, if using. Season with salt and pepper, to taste.
  5. Serve with rice and cilantro. 


Picture
Jesse Haas, CNS, LN is a licensed functional nutritionist and certified health coach. She was a founding partner of Wellness Minneapolis and was an active practitioner with the clinic from 2014-2022. To connect with her regarding functional nutrition and health coaching services, please follow this link.
0 Comments

Simple Cooked Apples

12/21/2020

0 Comments

 
From the Kitchen of Lynn Salmon-Easter, Reiki Master
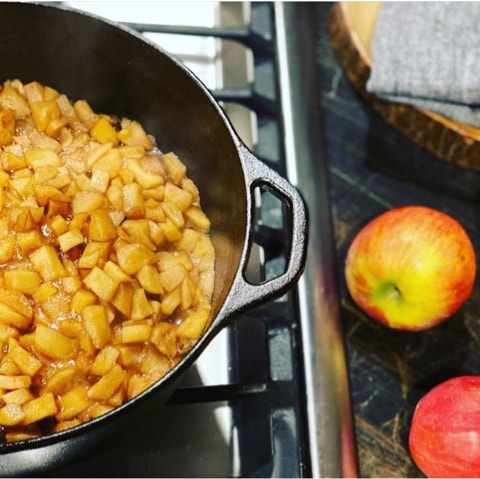
Cast iron skillet on a stove with cut apples cooking inside and 2 whole red apples on the countertop next to the stove
Photo from Joanne Grobe
This is my family’s favorite way to eat apples in the fall and winter months. It's simple...but somehow still so special! 

Makes about 2 - 2 1/2 cups

Ingredients
  • 4 small apples or 2 large apples
  • 1/2 cup water 
  • 1 Tablespoon butter
  • 1 teaspoon cinnamon


Directions
  1. Rinse apples and cut them into chunks. It is optional to leave the skins on the apples or peel the skins off. 
  2. Place cut apple into a heavy bottomed pan with water, butter and cinnamon.
  3. Cover tightly with a lid and bring to a boil.
  4. After the apples reach a boil, take the lid off the pan and turn down to a simmer.
  5. Simmer apples until all the water is cooked off.
  6. Allow apples to cool completely and store in a glass container with a tight fitting lid.


0 Comments

Exploring Flavor with a Recipe-as-Ritual (Citrus Sea Salt Recipe)

12/7/2020

0 Comments

 
From the Kitchen of Dr. Hamilton
Sun setting over a body of water with an orange sky and mountainous scenary
Photo by Barna Bartis on Unsplash
One of the most frequent questions I’m asked is how Chinese herbal medicines work. Chinese herbs are complex and intricate; each herb involves many specific characteristics and flavors. The following recipe-as-ritual is an invitation to explore the energetics of just one flavor as a way of understanding how herbs and minerals move in our bodies.

Salt is humble magic. It dissolves hardness. It exfoliates and clarifies, sloughing off the old and making way for the new. Salt offers tempering minerality and preserves what’s worth saving.

And, what's more, the energetics of salt attunes us to seasonal change.  

In the symbolic language of Chinese medicine, all flavor has direction, and each flavor co-resonates with a web of inter-related energies in our bodies and in nature. 

Acrid disperses, sour gathers, sweet moderates, bitter consolidates, salty softens.
- Huang Di's Inner Classic of Delicately Pure Questions, Chapter 22

From the perspective of this tradition, salty flavor is said to soften hardness. Salt resonates with the season of winter, the element of water, with our kidneys (referred to as the Kidney Organ Network to include the meridians), and with the emotions of awe/wonderment (balanced) or fear (imbalanced).

So, salt is not just a taste but an exploration of how our bodies interact with the world. Can we let our energy turn deeply inward just like nature does in winter? Can we be humble and seek the lowest place, like water? Can we connect with the wisdom of our inseparableness, as all water eventually converges in the salty ocean? Can we spend our reservoirs of energy (our Kidney qi) wisely, conserving and acting from our root?

You might put these flavor explorations into practice with the following Recipe-As-Ritual for Citrus Sea Salt. The result is a combination of the warmth of summer sunshine and briny ocean oneness; a solstice-time renewal.


CITRUS SEA SALT

Ingredients
  • Basic proportions are 1+ tablespoon zested citrus peel (about 1 medium-sized orange) per 1/2 cup flaky salt.
 
— Salt: Choose a coarse, flakey salt if you have one (e.g. Maldon salt, fleur de sel, sel gris). Experiment: you may need to adjust your proportions to taste.
— Citrus: Choose your favorite citrus (e.g. lemon, orange, grapefruit, kumquat, lime, kaffir lime). If you can, buy organic. Wash, gently scrub, and dry completely.

Directions
  1. Zest your fresh citrus peel very finely (a microplane, peeler or grater works well). 
  2. Mix the salt and zested citrus peel — about 1+ tablespoon citrus peel to 1/2 cup flaky salt.  Take your time to mix thoroughly, allowing the volatile oils to meet the crystals. Avoid shattering all the flakiness  (I like to infuse the mix with my intentions at this stage, especially if I’m making this as a gift). Taste and adjust proportions as desired. 
  3. Spread your salt onto a parchment-lined baking sheet. Dry in the oven at 200°F/95°C for 70 minutes or until your citrus peel is completely dry (crumbles between your fingers).
  4. Remove from oven and allow to cool a bit. Optional: pulse your citrus sea salt in the food processor a few times to adjust the texture and blend completely.

Save in an airtight jar for several months.


These flavor-infused salts help avoid flavor ruts and excesses by shifting your palate. Get curious about the energetics of flavor and what your system is drawn to. Here are some suggested uses:
  • Blood orange sel de gris on the rim of a sparkling breakfast beverage.
  • Grapefruit kumquat sea salt on dark chocolate desserts. 
  • Kaffir lime finishing salt on curry bowls. 
  • Meyer lemon salt on steamed asparagus.
  • Play with adding other spices (chili, ginger, curry) or herbs (rosemary, thyme, basil, fennel). 

When consumed in appropriate combinations the qi and flavors serve to supplement the essence and enrich the qi. – Huang Di’s Inner Classic of Delicately Pure Questions, Su Wen Chapter 22
References:
1. Unschuld, P. U. Huang Di nei jing su wen: an annotated translation of Huang Di’s Inner Classic – Basic Questions, 1st Ed.  

0 Comments

Coconut Cacao Granola

10/1/2020

1 Comment

 
From the kitchen of Jesse Haas, CNS, LN
Picture

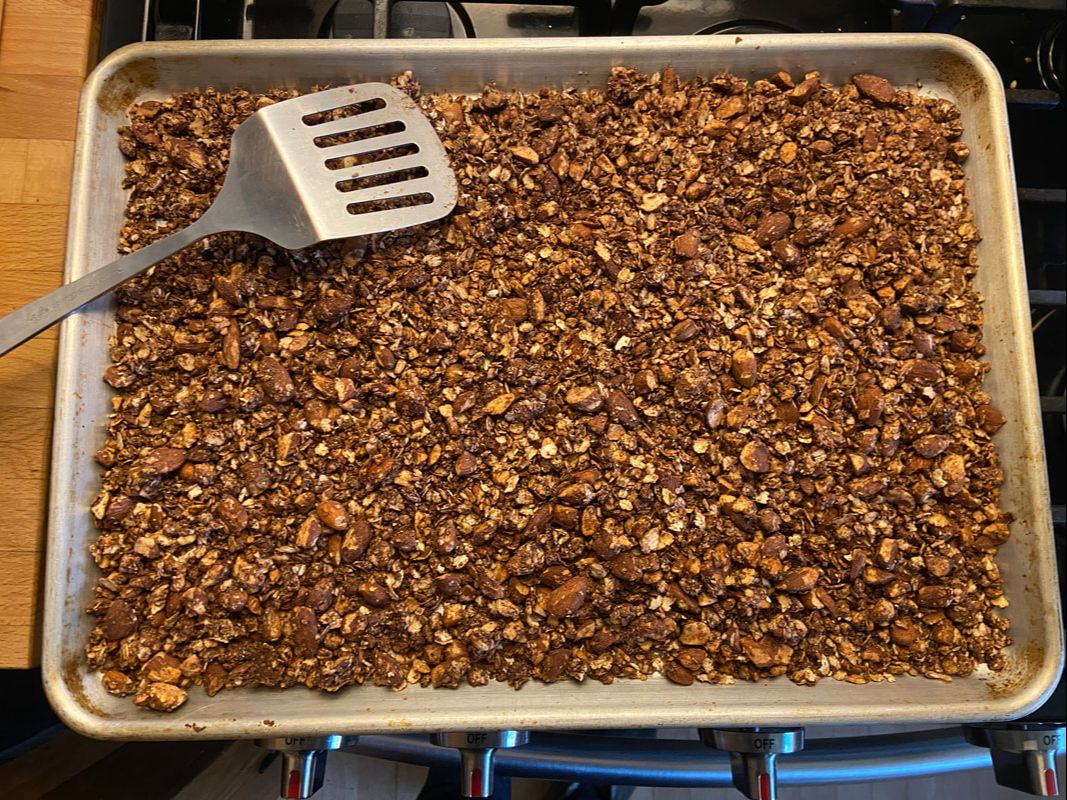
I love learning about the health benefits of foods I love, like chocolate, almost as much as I love sharing that good news with my clients. Many people come to see a nutritionist prepared to be told they have to stop eating all the things they enjoy and learn to love kale...or else. I like to focus instead on bringing in more of the foods that have a functional purpose for bringing more balance and wellness. If we need to eliminate a food or food group, coming at it from "eat more X" is a much more encouraging focus than "stop eating Y." 

Cacao, the raw ingredient that is transformed into chocolate, is a valued food in functional nutrition. Full of a class of polyphenols called flavonols, cacao has major cardiovascular benefits. This potent antioxidant nutrient keeps our capillaries, veins and arteries flexible and toned. Cacao also contains a molecule called anadamide that bring us some bliss - who doesn't need more of that these days? 

Chocolate granola may seem wholly indulgent - which is great! - but really, it's a powerful way to start the day. Serve with some non-dairy yogurt and Mixed Berry Chia Compote. This recipe is a nutritious breakfast and a great pre-workout snack. Enjoy!


Makes 8 cups or 16 1/2-cup servings

Ingredients
  • 3 cups gluten-free rolled oats
  • 3 cups nuts*
  • 1/2 cup flaked coconut (unsweetened)
  • 4 Tbsp chia seeds
  • 1 tsp salt
  • 1/3 cup cacao powder or unsweetened baking cocoa
  • 1/3 cup maple syrup
  • 1/2 cup melted virgin coconut oil**

Directions
  1. Preheat the oven to 350 degrees F. 
  2. Measure out your nuts into a food processor. Pulse 5-10 times to chop coarsely into a desired texture and size. 
  3. In a large mixing bowl, mix together oats, chopped nuts, coconut, chia seeds, salt and cacao powder. 
  4. In a separate bowl, mix together maple syrup and melted coconut oil. Pour over the oat mixture and stir well to combine. 
  5. Spread the mixture out evenly onto 2 cookie sheets. You want a thin layer for even toasting. Bake for approximately 20 minutes, stirring every 5 minutes to prevent burning on the edges. 
  6. Remove from the oven and cool completely before transferring to an air-tight container. This granola will keep for several weeks.


*The granola pictured here contains 1 cup each of almonds, hazelnuts and cashews. Use any mixture of nuts you like!
​
**Pro Tip: I measure out my coconut oil and put it into the oven to melt while the oven preheats and I get the rest of my ingredients mixed together. 

Picture
Jesse Haas, CNS, LN is a licensed functional nutritionist and certified health coach. She was a founding partner of Wellness Minneapolis and was an active practitioner with the clinic from 2014-2022. To connect with her regarding functional nutrition and health coaching services, please follow this link.
1 Comment
<<Previous

    Recipes

    Every time you eat is an opportunity to nourish your body. Find our recipes on Pinterest!

    Get recipes delivered to your inbox monthly! Sign up for our newsletter.
    Sign up

    Recipe Box

    All
    Breakfast
    Dairy Free
    Drinks
    Fall
    Gluten Free
    Main Course
    Side Dish
    Spring
    Summer
    Treats
    Vegetables
    Winter

    RSS Feed

Contact Us • Newsletter Signup
Phone: (612) 598-8627
Fax: (833) 792-0900
Find us on Instagram @wellnessmpls
Thank you to Emma Freeman and Lizzy Fasching for many of the photos on this site.
© Wellness Minneapolis | All rights reserved