
From the kitchen of Lynn Salmon-Easter, Reiki Master
I feel fortunate to be surrounded by great cooks in my family. One of my most favorite recipes I have received from my aunt who is a French chef is this down-home comfort food recipe.
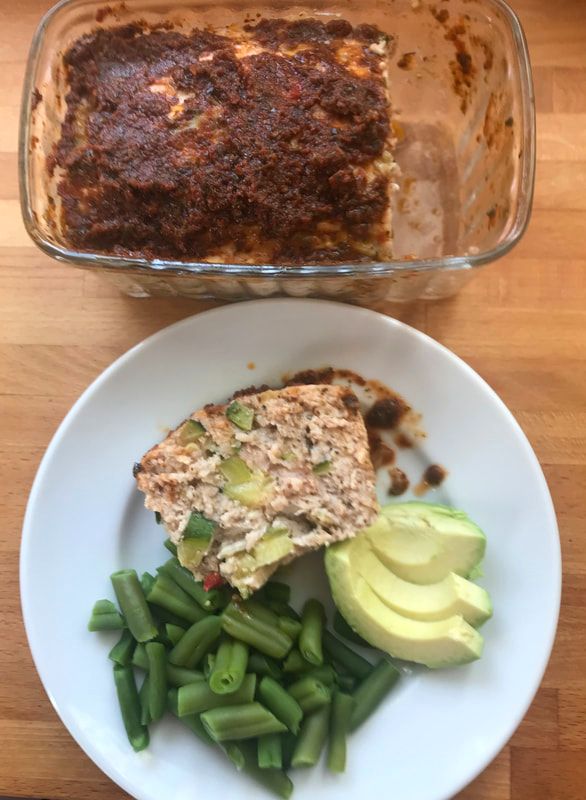
This meat loaf is delicious straight out of the oven or excellent cold as leftovers as well. I often use up tidbits of leftover veggies from my fridge in this meat loaf, but the tried and true recipe can be found below.
This recipe is adapted from Marysue Salmon from Cooking Light
Makes 12 servings
Ingredients
Directions
This meat loaf is delicious straight out of the oven or excellent cold as leftovers as well. I often use up tidbits of leftover veggies from my fridge in this meat loaf, but the tried and true recipe can be found below.
This recipe is adapted from Marysue Salmon from Cooking Light
Makes 12 servings
Ingredients
- 2-4 teaspoons olive oil
- 1 cup chopped onion
- 3/4 cup chopped carrot
- 1/2 cup chopped green onion
- 2 minced garlic cloves
- 1/2 cup chopped red pepper
- 2 1/4 - 2 1/2 pounds of ground turkey (or ground chicken)
- 1 cup dry breadcrumbs (optional)
- 1 teaspoon each: nutmeg, cumin, coriander
- 2 eggs, beaten
- 1/3 cup catsup
- 1 cup catsup or chili sauce
- 3 tablespoons brown sugar
Directions
- Sauté vegetables, through garlic, in optional oil about 5 minutes or until soft.
- Combine with turkey, crumbs, 1/3 cup catsup, seasonings, and eggs, and mix well.
- Mixture will be wet.
- Shape into 9 x 5 inch loaf and place on a broiler pan. Bake at 350 degrees 45 minutes. Remove from oven, spread mixture of catsup-brown sugar on top, and return to 350 degree oven for 30-45 more minutes, or until glazed and done.
- Let stand a few minutes before cutting.


 RSS Feed