Wellness Minneapolis
  • Home
  • Appointments
  • Dr. Barrett
    • About Dr. Barrett
    • Naturopathic Medicine
    • Mentoring
    • Dr. Barrett's Blog
  • Dr. Aidanne
  • Jesse Haas, CNS, LN
  • Resources
    • Blog
    • Recipe Box
    • Book List
  • Newsletter Signup
  • About
    • Forms
    • Testimonials
    • FAQs >
      • Charm FAQ
  • Contact
  • Shop

Fresh Fennel Salad

8/17/2020

0 Comments

 
From the kitchen of Amy Daws, CMT
Picture

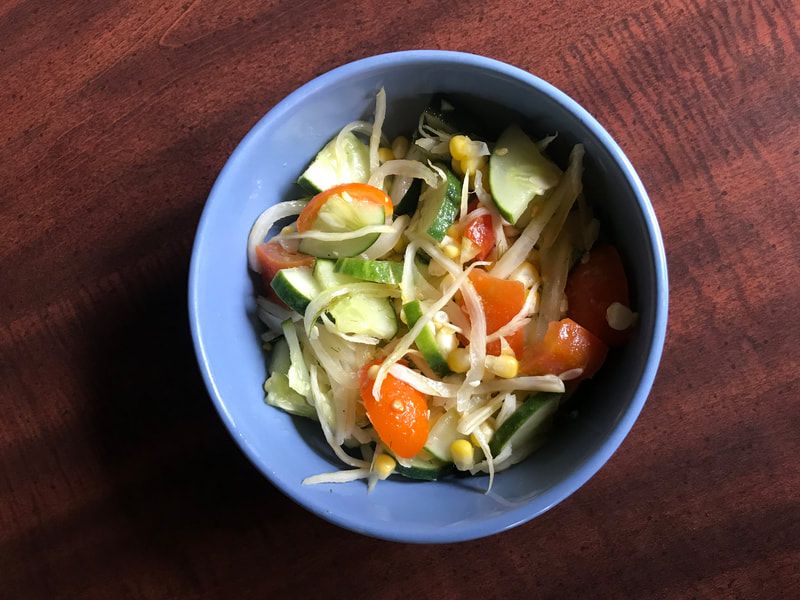
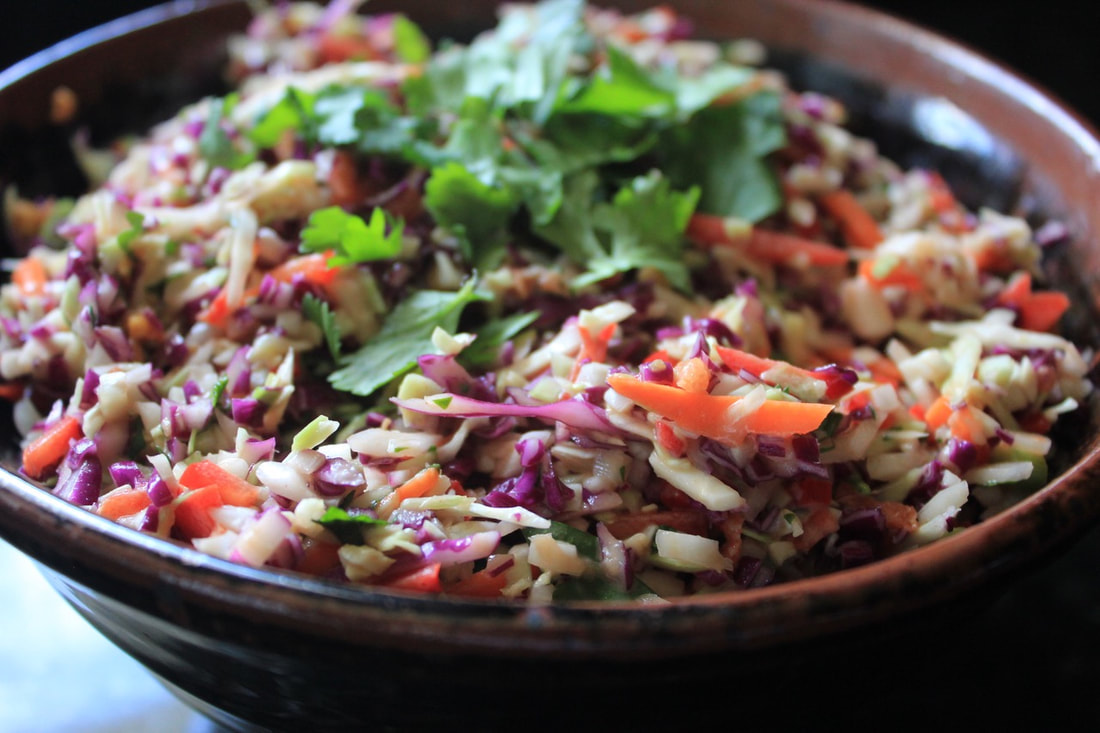
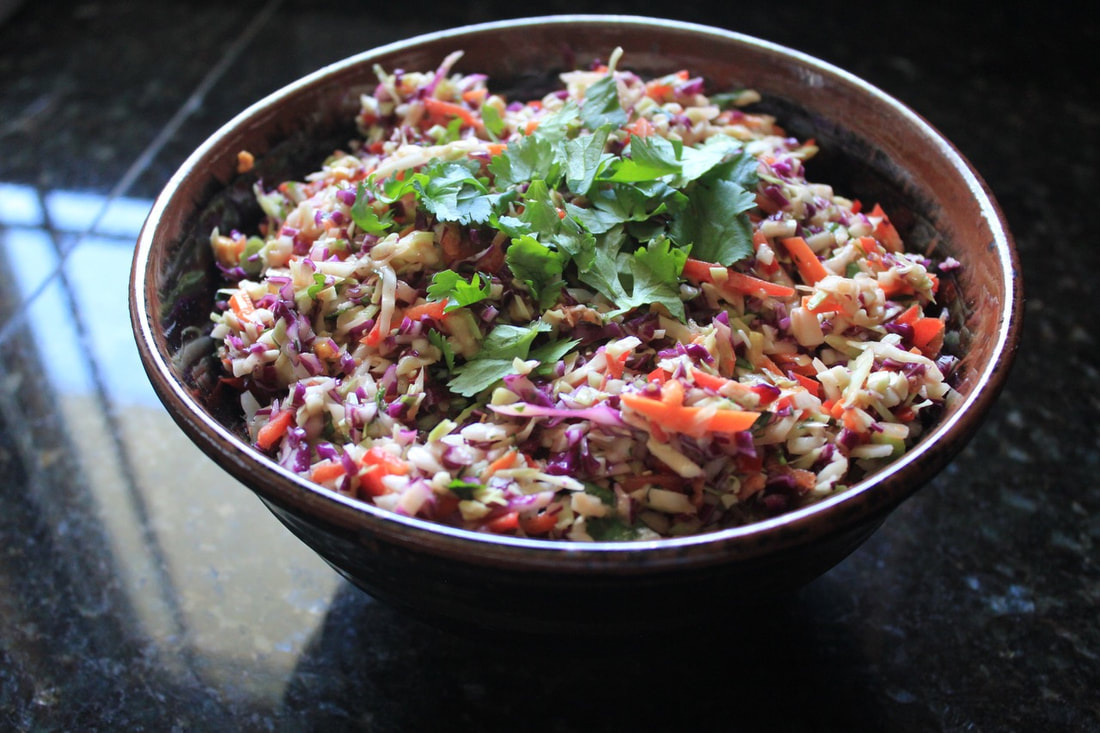
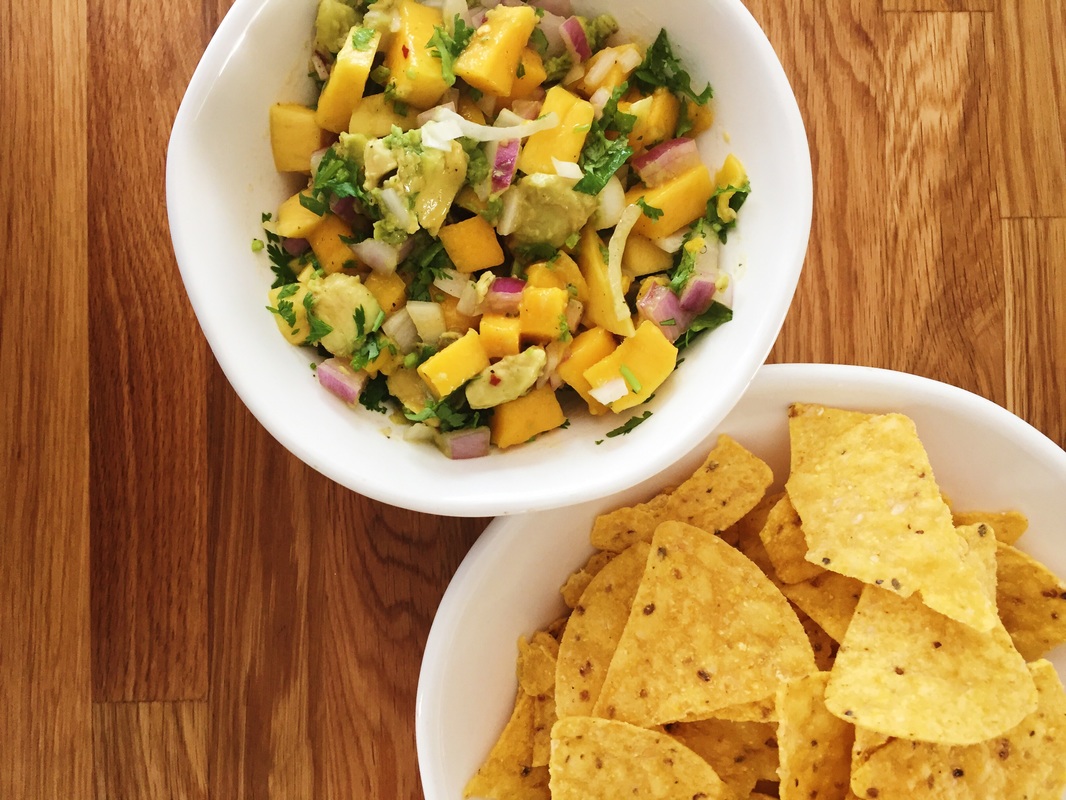
The fennel in this salad really makes it pop and it's super easy to make. A great way to enjoy summer vegetables from your CSA or home garden.  Download a printable recipe here. 

Download this link for a printable version of this recipe. 

Makes 4-6 servings

Ingredients
  • 1 fennel bulb with fronds
  • 1 corn cob, grilled or boiled
  • 1/2 pint cherry tomatoes
  • 1/2 onion
  • 1 cucumber
  • 2 Tbsp. lemon juice
  • olive oil
  • salt and pepper
  • feta (optional)

Directions
  1. Remove fennel fronds from stalk and coarsely chop
  2. Shave fennel paper thin 
  3. Cut corn off the cob
  4. Quarter tomatoes
  5. Cut onion into very thin slices
  6. Halve cucumber lengthwise and cut into thin slices 
  7. Combine all vegetables into a bowl
  8. Add lemon juice and drizzle with olive oil and salt and pepper to taste.
  9. Add chopped fennel fronds and feta (optional)

0 Comments

Raw Mango Rice Salad

8/3/2020

0 Comments

 
From the kitchen of Vanashree Belgamwar, BAMS
Picture
Raw, unripe mango is cooling according to Ayurveda, which means that it balances the Pitta/fire element. The pungent spices in this recipe - mixed in rice - help the naturally weak digestive fire during hot summer months. Cilantro is another cooling herb which helps balance the hot quality of Pitta without increasing the air element.

Makes 4 servings

Ingredients:
  • 1 cup Boiled rice
  • 1/2 cup grated green mango (unripe)
  • salt to taste
  • finely chopped cilantro
  • 1 tsp avocado or other neutral-flavored oil
  • 1/2 tsp mustard seeds
  • 1/2 tsp cumin seeds
  • a pinch of asafetida
  • 2 dried red chillies (optional, especially for Kapha individuals)
  • curry leaves
  • 1 tsp peanuts
  • 1/4 tsp turmeric powder

Directions:
  1. Take rice into a dish. The rice should not be sticky.
  2. Add grated raw mango and salt. Mix well.
  3. Add coriander leaves and mix well again.
  4. Heat oil in a small frying pan. Add mustard seeds and let them pop up.
  5. Add cumin seeds, asafetida, red chillies, curry leaves and peanuts. Fry until peanuts turn reddish.
  6. Remove from heat and add turmeric powder. Spoon the seasoning over the rice and mix well.
0 Comments

Blueberry and Ginger Shrub

7/22/2019

0 Comments

 
From the kitchen of Dr. Stamer
Picture

What in the world is a shrub? A shrub is a delicious fruit and herb infused drinking vinegar. It is a great addition to mocktails, can be used before meals to stimulate digestion, or just sipped for a yummy seasonal drink! I like to make a couple with each season’s fruits and have them stored in my refrigerator for use all year long.
 
Ingredients
  • 1 cup blueberries
  • 1 tbsp grated ginger root
  • 1 cup apple cider vinegar (my favorite is Bragg’s)
  • 1/2 cup honey                          
  • Sparkling water, to serve

Equipment
  • Glass pint canning jar with plastic lid or metal lid & parchment paper
 
Instructions
  1. Prepare your clean glass pint jar and it’s lid. You can boil both for 10 minutes, or use it straight from the dishwasher or after washing with soap and hot water. You can use a plastic or metal lid. The plastic lid is useful because the vinegar will erode a metal lid. If using a metal lid you will need parchment paper to place between the jar and the lid to prevent erosion.*
  2. Place 1 cup of blueberries and 1 tbsp of freshly grated ginger into the jar.
  3. Smash the blueberries with a clean metal spoon.
  4. Add 1 cup of apple cider vinegar.
  5. Wipe the top of the jar with a clean & damp cloth. Cover with plastic lid or metal lid. If using metal lid, place a square of parchment paper over the top of the jar, then twist the metal lid on. You don’t want the vinegar to touch the lid of the jar as it can cause erosion of the metal, and your shrub will taste like metal too!
  6. Let it sit in a cool, dark place for 1-3 weeks. Shake a couple times per week.
  7. Strain the fruit and ginger from the vinegar with a cheesecloth.
  8. Add ½ cup honey to your vinegar mixture. Shake to dissolve the honey into the vinegar mixture right in your pint jar.
  9. Store the shrub in your refrigerator.
  10. To serve, mix 1 tbsp of your shrub syrup with 8 oz of sparkling water, mix into your favorite drink creation, or sip as is to stimulate digestion before a meal. Enjoy!
 
You can make this recipe with any fruit or herbs that you like! The ratio I commonly use is a 1:1:0.5 ratio for fruit to vinegar to sweetener, and you can play around with what amount of herb would compliment the taste of the fruit. I like to have my shrubs be on the more sour side, but you can add more sweetener to your liking!
 
*Because this isn’t done with a true canning process, there is a risk of bacteria growth. This is unlikely if you use proper cleanliness techniques and due to the high acid content of vinegar.

For a printable PDF, click here

0 Comments

Cold PRess Cacao Smoothie

7/9/2019

0 Comments

 
From the kitchen of Jesse Haas, CNS, LN
Picture
Humans are always looking for reasons to justify and rationalize their cravings, which is one reason that chocolate continues to be looked at for its aide in balancing blood sugar, preventing heart disease, promoting weight loss and more.
 
I’m down with that! I am definitely a chocolate lover, so have no qualms with supporting my chocolate habits with scientific evidence.
 
Cacao – the unprocessed form of chocolate – is a nutrient-dense addition to your pantry staples. My favorite things about cacao include it’s magnesium content for combating stress, anxiety and sleeplessness, and the antioxidant flavonoids. Flavonoids are a class of compounds that help keep our cardiovascular system flexible. If you think of your arteries and veins as hoses and your blood as the water moving through the hose at high pressure, you can easily see how flexibility is key. We want our blood effortlessly circulating throughout our bodies! Use cacao in place of baking chocolate, which has undergone processing that damages many of the phytonutrients that makes cacao so powerful.
 
Adding a tablespoon of cacao powder to my smoothies has become a habit I feel very good about. Here’s one smoothie formula, that I’m really digging lately. Enjoy!
 
Makes 1 serving
 
Ingredients:
  • 3/4 cup cold press
  • 1/4 cup Thai coconut milk
  • 2 Tbsp almond butter
  • 1-2 Tbsp cacao powder
  • 1 frozen banana
  • 1/2 cup frozen cauliflower
 
Directions:
  1. Place all ingredients in a high-powered blender and blend until smooth.

For a printable PDF, click here

Jesse Haas, a white, cis-female with brown hair and dark glasses. She’s wearing a bright green sweater.
Jesse Haas, CNS, LN is a licensed functional nutritionist and certified health coach. She was a founding partner of Wellness Minneapolis and was an active practitioner with the clinic from 2014-2022. To connect with her regarding functional nutrition and health coaching services, please follow this link.
0 Comments

Un-deviled Eggs aka Lazy Devils

6/3/2019

0 Comments

 
From the kitchen of Lynn Salmon-Easter
Picture
Adapted from the kitchen of: Michelle Tam + Henry Fong and their cookbook Nom Nom Paleo: Food for Humans

I love eggs!  They are so versatile!! I enjoy deviled eggs, but I am not a fan of all the fuss it takes to make them. When I hit the summer potluck and party circuit, I like to turn to Michelle Tam’s lazy devils for food that is fun, fast and nourishing too. This recipe for un-deviled eggs (aka lazy devils) fits the bill. You can make the recipe with a plan in mind or just boil up some eggs and see what toppings you have in your fridge.
 
Ingredients
  • 12 large eggs, preferably ones that are at least one week old
  • 6-8 cups water
  • 1 teaspoon baking soda
 
Directions
  1. Gently place eggs in a wide saucepan in single layer and add the water and the baking soda. (The sodium bicarbonate will help the eggs separate from their shells, making them easier to peel.) Make sure the eggs are at least 1 inch below the surface of the water.
  2. Put the saucepan on the stove, and crank the heat to high. As soon as the water comes to a boil, set a timer for 1 minute. When the minute is up, take the pot off the heat, cover with a lid, and let the eggs sit in the hot water for 10 minutes. Don’t forget to set a timer!
  3. In the meantime, fill a large bowl with water and ice. Once the timer goes off, transfer the eggs to the ice water and submerge for 5 minutes.
  4. Then take the eggs out of the icy water, gently tap them against a hard surface to crack shells and peel each egg.
  5. Hopefully, you have perfectly cooked eggs. If you aren’t eating the eggs right away, store                  them in the fridge in a sealed container. They will keep for up to a week.
  6. When you are ready to make your un-deviled eggs, cut each egg in half lengthwise and dress with your favorite toppings below.
 
Toppings for un-deviled eggs (aka lazy devils):
 
The sky is the limit friends! Let your imagination run wild!! Below are some tried and true ideas I have used.
 
Guidelines for successful un-deviled eggs:
  • Use a creamy sauce to help toppings stay on top of the egg
  • Toothpicks are functional and pretty for this party fare

BLT: mayo, tomato, lettuce, bacon
 
Salmon Surprise: mayo or guacamole, cucumber, cooked salmon with garlic and dill
 
Mediterranean: hummus, roasted red pepper, basil, kalamata olive
 
Here are the eggs featured by Michelle Tam + Henry Fong in their cookbook Nom Nom Paleo: Food for Humans (all items listed in Michelle’s toppings can be made from her cookbook)
 
Classy Devil: ranch dressing (paleo), bacon, greens, tomato
 
Island Devil: mayo (paleo), slow cooker (Kalua) pork, pineapple, cilantro and sea salt
 
Lazy Devil: sriracha mayo (paleo), prosciutto, chives, sea salt
 
Crabby Devil: holy moly guacamole, crab, apple and lime juice, freshly ground pepper

For printable PDF of recipe, click here
0 Comments

Sunflower Kale Pesto

9/3/2018

0 Comments

 
From the kitchen of Raki Kopernik
Picture
This is a recipe I created based on the idea of tradition basil pesto. I wanted to make a healthier pesto and find a way to feed those leafy greens to my family and friends when they get sick of salads and steaming. This is also a great way to preserve large amounts of greens. I often make a few batches at the end of the garden season.
 
I’m not much of a recipe follower, but I love cookbooks and recipes for the seed (pun intended) of inspiration. I encourage you to use whatever greens and seeds or nuts you have on hand and whatever flavors you’re craving. I like to spread this on toast, sandwiches (particularly tempeh Ruebens – I’ll give you that recipe next time), add to salads, as a veggie or cracker dip, mixed in with grains, pastas, on eggs, really it can go on anything savory.
 
         Ingredients
  • 1 bunch of kale, any variety - You can also use any or a combination of collard greens, broccoli leaves, chard, beet greens, carrot tops etc. Literally any hardy greens.
  • 1/2 cup sunflower seeds - Sunflower seeds are particularly delicious to me, but you can use pine nuts, pumpkin seeds, walnuts, hazelnuts, or a combination etc. If using something less oily like almonds, soak them first for a few hours.
  •  1-2 tsp turmeric powder - This is less for the flavor and more for the health benefits. I add turmeric to everything. It’s high in anti-inflammatory and antioxidant nutrients.
  •  2-4 cloves of garlic
  •  Juice of 1 lemon or lime
  •  1/4 cup olive oil and/or coconut oil
  • Pinch of salt and pepper
  • Any other spices you like to use. I am very fond of smoked paprika

​          Instructions
  1. Loosely chop up greens and place in a food processor. Pulse or run for a few seconds.
  2. Add seed/nuts and again pulse or run for a few seconds until things start to look combined and mealy.
  3. Add the rest of the ingredients and run for about 10 seconds. Using a rubber spatula, scrape the sides of the container and run again for 5-10 second.
  4. Add more oil if it feels too thick. I like the consistency to be pasty so I can spread it, like peanut butter. It can be as chunky or as creamy and you prefer.
  5. Store pesto in a mason jar in the fridge and label it with the date. It will likely last for about 3 weeks.
  6. YUM!

​Click here for a printable version

0 Comments

Backpacking Food

8/6/2018

2 Comments

 
Authored by Dr.Sara Jean Barrett
Picture
Picture
I love backpacking. Getting deep in to the woods, miles from anyone else and being totally immersed in nature is pure bliss. One major challenge for backpacking is how do you bring nourishing food to last several days that is light and easy to bring along? An even bigger challenge is doing this on a low carb diet! I had to tackle this head on getting ready for a backpacking trip this summer. My partner and I spent many hours researching and preparing so I want to share with you what I have learned. This isn’t a typical recipe blog more of a how-to guide to plan for healthy
camping/backpacking meals.  

Breakfast:
Most backpackers rely on oatmeal for a satisfying breakfast. It is light to carry and easy to prepare. So we didn’t stray far from this classic we found Wildway Grain Free Instant Hot Cereal. We tried four of their flavors and my favorite was toasted coconut. We brought along some chia seeds and coconut oil to add to this breakfast.
Net carbs= 8g


Lunch:
In the middle of the day we were moving so we didn’t really want to sit down and eat a big meal so we broke lunch up in to two smaller meals.

Meal 1: We brought along with us some pecans and my favorite turkey jerky by Vermont Smoke and Cure. Eating ¼ cup of pecans and 2 jerky sticks each gave us enough fuel to make it to our second smaller meal.
Net carbs=  3g
 
Meal 2: We combined chocolate protein powder, fiber powder, greens powder and powdered coconut milk with water for a chocolate pick me up drink. My current favorite protein powder is NutriDyn’s Chocolate Paleo Protein.  We also use NutriDyns fruits and greens powders for an extra boost. My favorite is their espresso flavor.

Net carbs= this will depend on what fiber you use and if you choose to add a greens powder. The greens powder does increase the carb count for us this came out to 9 grams.
 
Dinner:
We rotated through 4 different dinner meals that each combined a protein + veggie pouch + seasoning + fat.
 
Let’s start with the prep work at home.

Picture
Protein:
We have a dehydrator and used that to dehydrate several pounds of ground beef. (insert picture of dehydrating beef). The process is quite simple you cook the beef thoroughly, strain off the fat (I know this isn’t very ketogenic but in order dry properly and keep it from spoiling it must be done) and pat it dry with a paper towel. Then spread it out on the dehydrator. We found that after a few hours it helps to move it around to ensure if fully dries out. It’s amazing how small a pound of ground beef becomes

Next time we will try dehydrating chicken. This time we settled for some chicken pouches that we took with us on shorter trips.


Picture

Veggies:
For vegetables we didn’t have the time or energy to dehydrate ourselves this trip so settled for buying dehydrated broccoli, spinach, onion and celery. We made individual pouches combining these and used them with every dinner. In the end we didn’t like the celery. It never rehydrated well and was quite chewy so I would leave that one out.


For multiday backpacking we used pouches of spices that we assembled at home. My favorite was a curry we put together. For days that we weren’t hiking far we used premade sauce mixes.

Fat:
We brought two small jars of coconut oil to add to our meals. We also had some packets of almond butter to add to our curry dinner as well as powdered coconut milk. We bought a few unripe avocados and managed to keep them safe and added them to a few of our dinners as well.
 
Putting it all together:
The dehydrated beef worked out surprisingly well. We did discover that it works best if you add the beef to a bowl with a few cups of water and let it sit covered for at least 30 minutes before starting to cook. Once the dehydrated beef was pretty well rehydrated we used our camping stove to heat the beef, add more water if needed and added the spices/flavor pouch and vegetables. Cook until everything is rehydrated.

We ended our day with a square of Choc Zero chocolate

Tips:
We didn’t factor in how much sweating we would do and how much extra sodium we would require. We did bring along electrolyte packets to take once per day but a few days in I was starting to get lightheaded and realized I needed more salt. We make a quick stop and picked up some more salt before continuing on our way. A low carb diet often increases your salt requirements so if you will be sweating a lot in addition make sure you bring extra salt!
 
If you have any camping food tips please comment below. We are always looking for new ideas.it.
Picture
  • Dr.Sara Jean Barrett is Co-Founder of Wellness Minneapolis and a naturopathic doctor who treats patients of all ages with a variety of health concerns. Her passion for her practice is demonstrated in the strong relationships she builds with her patients. It’s those relationships that allow her to more deeply identify underlying causes of health issues and provide patients with personalized, natural health care options. Learn more about Dr. Barrett by visiting her professional website.

2 Comments

Asian Coleslaw

6/25/2018

0 Comments

 
From the kitchen of Dr. Pharis 
Picture

Summer is finally upon us and I could not be more excited for backyard games, cookouts, and coleslaw! While I love all things cabbage I’m pretty particular about coleslaw, and have never really enjoyed the typical creamy, sweet slaw dressings. And, yet, even greater than my love for cabbage is my love for all foods Asian or that are made with an Asian twist. Now you can see why this recipe is a win-win for me, and a staple in my recipe box. Even my toddler loves this recipe!
 
The best part about making a slaw is that there is a lot of room for “play.” Don’t like an ingredient? Take it out. Have extra veggies in your fridge that are about to go bad? Chop ‘em up and add them. Don’t tolerate a dressing ingredient? Substitute it. You really can’t go wrong.
 
On a side note – I often make the dressing portion of this recipe on its own and use it as a dip for fresh veggies. It keeps in the fridge for a couple weeks, and is a great mid-afternoon snack. I hope you enjoy it as much as I do.
 
Ingredients:
  • 3 tbsp rice wine vinegar
  • 3 tbsp olive oil
  • 3 tbsp creamy peanut butter (natural, unsweetened)*
  • 2 tbsp tamari sauce (low sodium)
  • 1 tbsp brown sugar
  • 1 – 1 1/2 inches fresh ginger, finely grated
  • 2-3 cloves garlic, finely grated
  • 2 cups purple cabbage, finely sliced
  • 2 cups green cabbage, finely sliced
  • 2 red bell pepper, finely sliced
  • 1 large carrot, julienned
  • 3 green onions, chopped
  • 1/2 cup fresh cilantro, chopped
 
Directions
  1. Whisk together rice vinegar, oil, peanut butter, tamari, brown sugar, ginger, and garlic. Set aside.
  2. Cut up all vegetables into fine pieces and mix in a large bowl.
  3. Toss with the peanut sauce 30 minutes before serving.
  4. Slaw can be kept in the fridge for a couple days, but will get a bit watery.
 
* Substitute other nut or seed butters in the case peanuts are not tolerated.

Click here to download a printable recipe card.

Picture
0 Comments

Mango Avocado Salsa

8/10/2016

0 Comments

 
From the kitchen of: Bri Dunbar
Recipe adapted from nomnompaleo.com
Picture
Take your own photos of this recipe and tag us on instagram @wellnessmpls
Click here for a printable PDF

I LOVE a good salsa! And in the summer I'm especially drawn to ones that incorporate fresh fruits. Sometimes in addition to the mango, we add in peaches or pineapple depending on what looks good while we are grocery shopping or perusing the farmer's market. This snack is a big hit at our house on sunny summer afternoons. Bonus points if it's enjoyed outdoors!!

Ingredients:
  • 1 mango, diced
  • 1/2 red onion, finely diced
  • 1 med avocado, diced
  • 1/4 cup fresh cilantro, minced
  • 2 Tbsp extra virgin olive oil
  • pinch of himalayan salt
  • pinch of fresh ground black pepper
  • 1/4 tsp red pepper flakes
  • juice from 1/2 lime
**optional: add in other diced fruits

Directions:
  1. Mix together.
  2. Serve with tortilla chips or pita chips.
**Also delicious over a piece of seared fish.

0 Comments

Delicious Green Smoothie

7/5/2016

0 Comments

 
From the Kitchen of: Karen Townsend
 
I am a huge fan of young coconuts and someday will live in a place where I can get them straight from the tree. The first time I made this smoothie I became obsessed with it and made it every day for weeks. It is refreshingly hydrating in the summer and a great way to bulk up on your greens. I adapted this recipe from a version of Kris Carr's.
Picture
Take your own photos of this recipe and tag us on instagram @wellnessmpls
Download a printable version of this recipe here

Delicious Green Smoothie
Serves 4

Ingredients:
  • 1 young coconut (flesh and water)
  • 1 avocado
  • Handfuls of spinach and/or Romaine lettuce (as much as you can pack into the blender)
  • Big handful of sprouts (I like alfalfa)
  • 1 cucumber
  • Pinch of cinnamon
  • Whichever greens you like in addition to these
  • Tiny splash of maple syrup to taste if you like a little extra sweet
 
Directions:
  1. Open young coconut and pour the water into a jar. Scrape the flesh out and place in blender. If you have never opened a coconut here are some helpful instructions. You can also find videos if that's your preferred learning method.
  2. Place avocado, greens, cucumber and  sprouts into the blender with the coconut and pour the coconut water in as the liquid to blend your smoothie.
  3. Blend until everything is smooth and creamy. Add a pinch of cinnamon and a splash of maple if you like and blend some more. Pour into glasses and serve!

0 Comments
<<Previous

    Recipes

    Every time you eat is an opportunity to nourish your body. Find our recipes on Pinterest!

    Get recipes delivered to your inbox monthly! Sign up for our newsletter.
    Sign up

    Recipe Box

    All
    Breakfast
    Dairy Free
    Drinks
    Fall
    Gluten Free
    Main Course
    Side Dish
    Spring
    Summer
    Treats
    Vegetables
    Winter

    RSS Feed

Contact Us • Newsletter Signup
Phone: (612) 598-8627
Fax: (833) 792-0900
Find us on Instagram @wellnessmpls
Thank you to Emma Freeman for many of the photos on this site.
© Wellness Minneapolis | All rights reserved